Introduction
In latency-sensitive applications like chatbot, end-users want to receive response quickly. Imagine you would have to wait 1 minute every time you ask a question to a chatbot like ChatGPT. Instead, we could utilize streaming response that allows sending streams of partial responses back to the client as they become available. Hence, response streaming could improve time-to-first-byte(TTFB) performance. Also, with streaming response, you don’t have to fit your entire response in memory.
In AWS Lambda, the standard buffered response has a limit of 6MB while the response stream payloads have a soft limit of 20MB.
AWS Lambda currently supports response streaming only on Node.js 14.x, Node.js 16.x and Node.js 18.x managed runtimes. Hence, we need to configure a custom runtime or use Lambda Web Adapter which we will use in this article.
FastAPI Project
Let’s simulate streaming response with FastAPI. FastAPI offers built-in StreamingResponse which takes an async generator or a normal generator/iterator and streams the response body.
1
2
3
4
5
6
7
8
9
10
11
12
13
14
15
16
17
18
19
20
21
22
23
24
25
26
27
28
29
30
31
32
33
34
35
36
37
38
39
40
41
42
43
44
45
46
47
48
49
50
51
52
53
import asyncio
import json
import time

from fastapi import FastAPI
from fastapi.responses import StreamingResponse
from mangum import Mangum

app = FastAPI(debug=True)

ARTIFACTS = [
    {
        "title": "Chatgpt api url questions: Chatgpt3.5 error",
        "description": "I tried to use openai's api,but it didn't work...",
        "uri": "https://stackoverflow.com/questions/76172889/chatgpt-api-url-questions-chatgpt3-5-error",
    },
    {
        "title": "installing pandas-profiling error in python 3.10",
        "description": "I am trying to install pandas-profiling in python 3.10 using pychan installation package option.",
        "uri": "https://stackoverflow.com/questions/71322187/installing-pandas-profiling-error-in-python-3-10",
    },
]


def generate_text_stream(query: str):
    lorem_ipsum = """Lorem ipsum dolor sit amet, consectetur adipiscing elit.
        Sed tincidunt ex ac quam pretium, ut interdum arcu pharetra. Nulla facilisi.
        Integer pellentesque libero quis est semper, vitae tristique ligula elementum."""

    for each in lorem_ipsum:
        yield each
        time.sleep(0.03)


@app.post("/stream/chat")
async def stream_chat(query: str):
    async def generate():
        stream_response = await asyncio.to_thread(generate_text_stream, query)

        yield "[START]"
        for chunk in stream_response:
            yield chunk
        yield "[END]"

        for artifact in ARTIFACTS:
            yield "[ARTIFACT]"
            yield json.dumps(artifact, indent=4)
            yield "[/ARTIFACT]"

    return StreamingResponse(generate(), media_type="text/plain")


handler = Mangum(app)
AWS Lambda Web Adapter
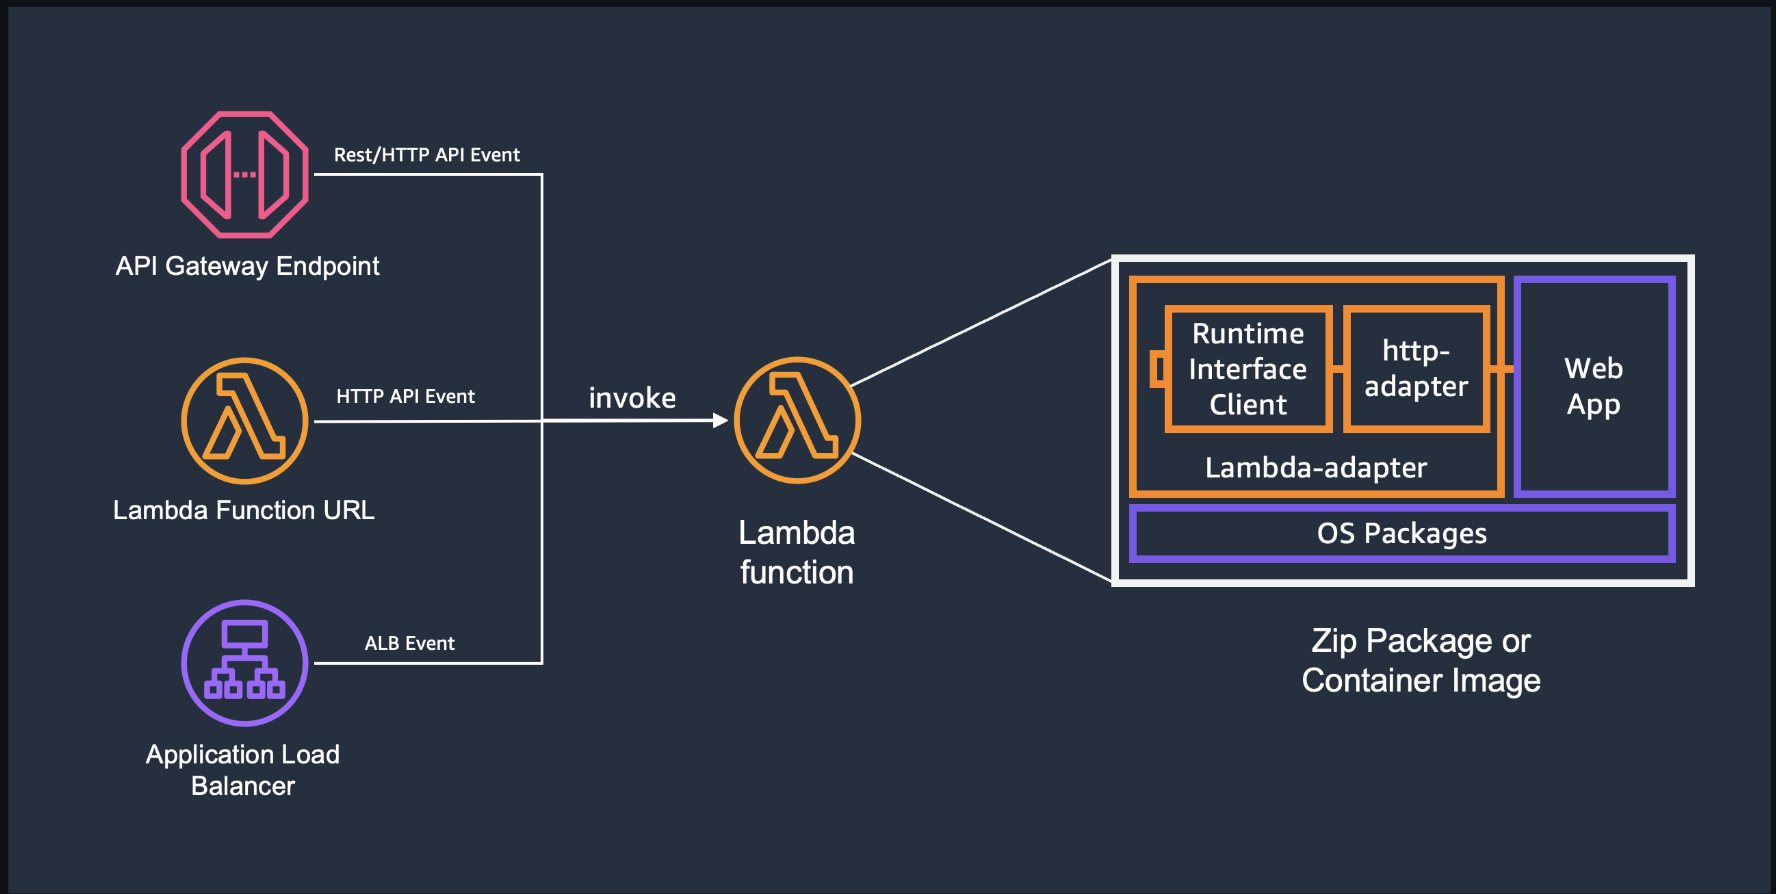
AWS Lambda web adapter is a tool to build web applications(HTTP API) and run it on AWS Lambda with familiar frameworks including Express.js, Flask, and FastAPI.
To add Lambda Web Adapter layer to the function, we need to do the following three things.
- Attach Lambda Web Adapter layer containing Lambda adapter binary and a wrapper script to the function
- x86_64:
arn:aws:lambda:${AWS::Region}:753240598075:layer:LambdaAdapterLayerX86:16 - arm64:
arn:aws:lambda:${AWS::Region}:753240598075:layer:LambdaAdapterLayerArm64:16
- x86_64:
- Set
AWS_LAMBDA_EXEC_WRAPPERto/opt/bootstrapboostrapis a file we need to create a custom runtime on AWS Lambda
- Create a handler to boot up the app:
run.sh
AWS Serverless Application Model (SAM)
We use AWS SAM to deploy our app on AWS. SAM is a toolkit to build and run serverless applications on AWS.
SAM consists of two parts
- AWS SAM template specification (
template.yamlfile) - open-source framework to define serverless application infrastructure on AWS - AWS SAM CLI
You can install SAM CLI with homebrew
1
brew install aws/tap/aws-sam-cli
Create template.yaml file in the project root directory.
1
2
3
4
5
6
7
8
9
10
11
12
13
14
15
16
17
18
19
20
21
22
23
24
25
26
27
28
29
30
31
32
33
34
35
36
AWSTemplateFormatVersion: '2010-09-09'
Transform: AWS::Serverless-2016-10-31
Description: >
  fastapi response streaming

# More info about Globals: https://github.com/awslabs/serverless-application-model/blob/master/docs/globals.rst
Globals:
  Function:
    Timeout: 60

Resources:
  FastAPIFunction:
    Type: AWS::Serverless::Function
    Properties:
      CodeUri: app/
      Handler: run.sh
      Runtime: python3.9
      MemorySize: 256
      Environment:
        Variables:
          AWS_LAMBDA_EXEC_WRAPPER: /opt/bootstrap
          AWS_LWA_INVOKE_MODE: response_stream
          PORT: 8000
      Layers:
        - !Sub arn:aws:lambda:${AWS::Region}:753240598075:layer:LambdaAdapterLayerX86:16
      FunctionUrlConfig:
        AuthType: NONE
        InvokeMode: RESPONSE_STREAM

Outputs:
  FastAPIFunctionUrl:
    Description: "Function URL for FastAPI function"
    Value: !GetAtt FastAPIFunctionUrl.FunctionUrl
  FastAPIFunction:
    Description: "FastAPI Lambda Function ARN"
    Value: !GetAtt FastAPIFunction.Arn
CodeUri: project source directoryHandler: handler script to boot up applicationAWS_LAMBDA_EXEC_WRAPPER:/opt/bootstrapAWS_LWA_INVOKE_MODE:bufferedorresponse_streamInvokeMode:RESPONSE_STREAM
Then, place run.sh script inside the specified project source directory above.
1
2
#!/bin/bash
PATH=$PATH:$LAMBDA_TASK_ROOT/bin PYTHONPATH=$LAMBDA_TASK_ROOT exec python -m uvicorn --port=$PORT main:app
The overall project structure is as follows
1
2
3
4
5
6
7
8
9
10
11
12
.
├── __init__.py
├── app
│   ├── __init__.py
│   ├── main.py
│   ├── models.py
│   ├── requirements.txt
│   ├── run.sh
│   └── util.py
├── poetry.lock
├── pyproject.toml
└── template.yaml
Deployment
Run the commands to build and deploy the application to AWS Lambda.
1
sam build --use-container
1
sam deploy --guided

