- Introduction
- What is container?
- What is an image?
- Demo FastAPI Project
- Write Dockerfile
- Build the Docker image
- Execute a Docker container
1. Introduction
To deploy a FastAPI project, one common way is to use docker to build a container image.
In this article, we’ll go through dockerizing a FastAPI project(similar for other frameworks too) and execute it locally. In the next article, we’ll deploy the project to AWS ECS.
2. What is Container?
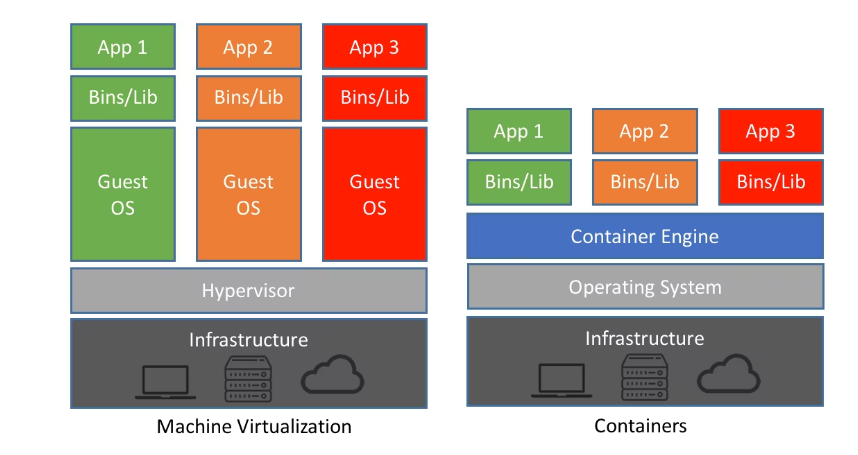
 [credit: https://www.netapp.com/blog/containers-vs-vms/]
We all have experiences the dependency hell where you try to install and execute a program then you fall into the mud of dependency errors.
As the name “container” suggests, a (linux) container is like a bucket to package your software with all its dependencies and files which are isolated from the outside world (also from other containers). For example, if you run the FastAPI container which internally executes uvicorn main:app on the port 8000, you cannot access to localhost:8000.
Unlike virtualization that virtualizes the entire machine including the OS levels, containers, running with isolated processes, do not create another set of hardware resources but share the same Linux kernel. Hence, containers are much more lightweight compared to virtual machines.
3. What is a Container Image?
As the name suggests, a container image is like a “snapshot” or a specific version of all the files, dependencies, env variables, etc. Thus, a container image is static that is not something you can execute.
On the other hand, a container is “run from a container image” with that exact version of all the files, dependencies, and so on of that image.
If you took an Operating System course, you could think a container image as a static blueprint “program” like hello.py and a container as a “running process”.
4. Demo FastAPI Project
Now let’s go ahead and create a simple FastAPI project so that we can execute it with a container.
First, create a project folder and create a virtual environment and activate it.
1
2
3
virtualenv .venv

source .venv/bin/activate
Install fastapi.
1
pip install "fastapi[all]"
Save the dependencies into requirements.txt
1
pip freeze > requirements.txt
Create folder {root_dir}/app where all the source codes reside in. Now, let’s write a simple FastAPI server code which prints Welcome to root for the root domain.
1
2
3
4
5
6
7
from fastapi import FastAPI

app = FastAPI()

@app.get('/')
def welcome_root():
    return "Welcome to root"
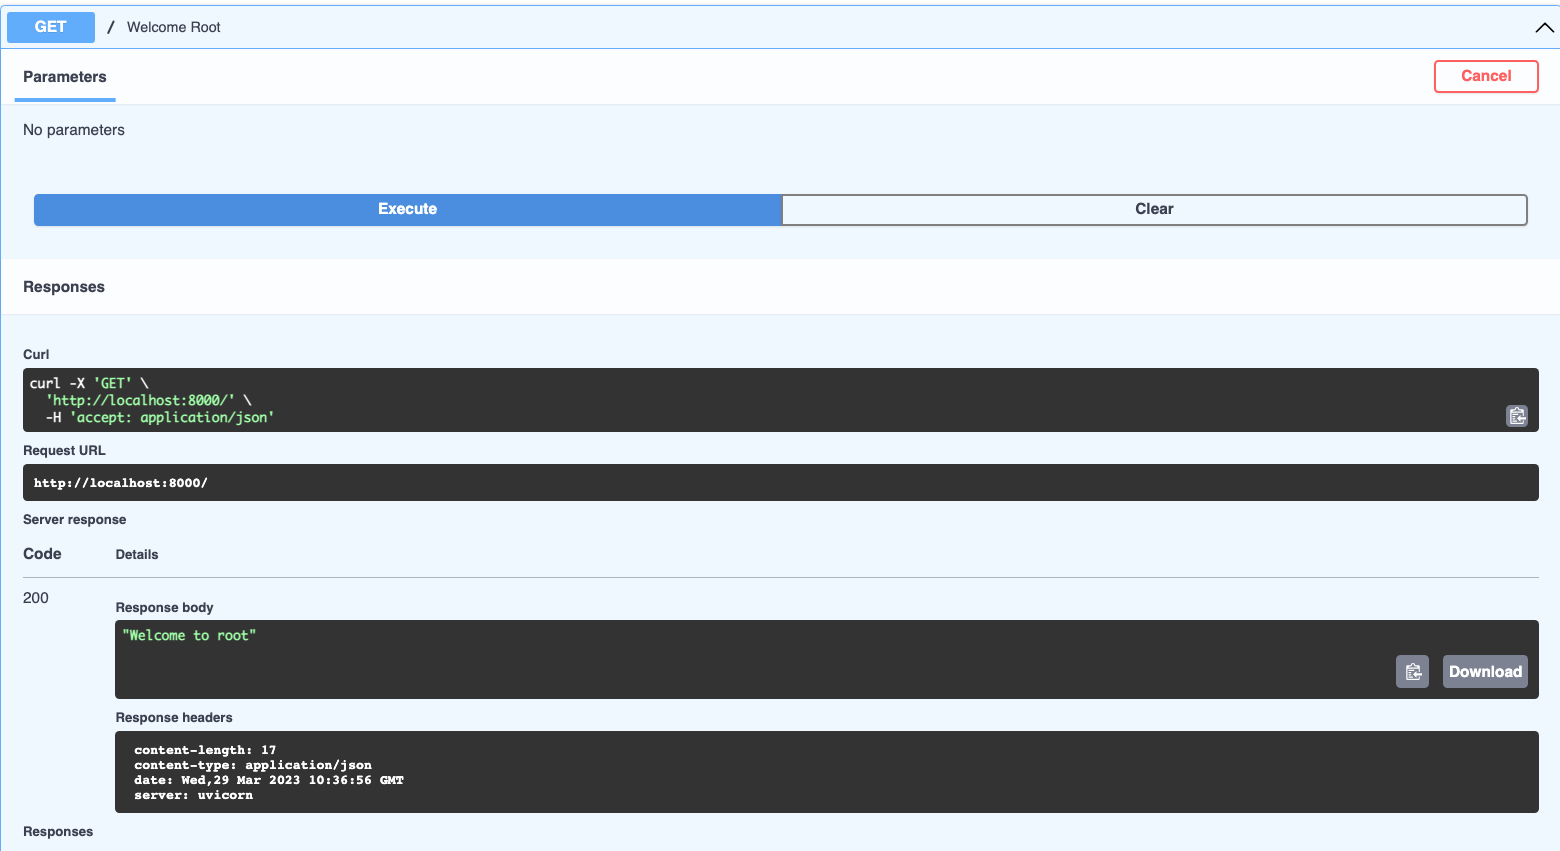
Now you can execute it with uvicorn app.main:app --reload. Check out localhost:8000/docs to try the api we created.
5. Write Dockerfile
It’s time to write a Dockerfile which contains the series of instructions and commands that will be executed when buliding a new container image. In other words, Dockerfile defines “how our container behaves”.
To write a Dockerfile, you usually provide the below three items.
- Specify a base image
- Commands or instructions to install dependencies or run additional programs
- Provide a command which will be run when the container starts
1
2
3
4
5
6
7
8
9
10
11
12
13
14
15
16
17
# [1] Specifying the base image (starting from python v3.8 image)
FROM python:3.8

# [2] Specifying the working directory in the container
WORKDIR /demo

# [3] Copy the dependency file
COPY ./requirements.txt /demo/requirements.txt

# [4] Install the dependencies
RUN pip install --no-cache-dir --upgrade -r /demo/requirements.txt

# [5] Copy our source files
COPY ./app /demo/app

# [6] Finally run it!
CMD ["uvicorn", "app.main:app", "--host", "0.0.0.0", "--port", "8000"]
Each step is pretty much self-explanatory. However, there’s one thing we have to focus on. Notice that we first copied the requirements.txt and install the dependencies. Then, we copy our source files. Is there any reason to do that? Yes!
Docker uses internal cache to boost up building a container. The most important thing to notice here is that Docker incrementally builds containers, by adding one layer on top of the other (from the top of Dockerfile to the bottom). If Docker finds an unmodified layer, then it will re-use that from the cache, saving tons of time for us.
The reason step 3 and 4 are above 5 is that the requirements file is not something that is modified very frequently compared to our source files. Hence, it’s more strategical to place the instruction to install dependencies above our source files.
In other words, suppose you have layer A, B, C. If the layer B changes, then we have to re-build all the layers B and C again. If the layer A changes, then we have to re-build A, B, and C.
If we placed COPY ./app /demo/app above the step 3 and 4 like below,
1
2
3
4
5
6
7
8
# Copy our source files
COPY ./app /demo/app

# Copy the dependency file
COPY ./requirements.txt /demo/requirements.txt

# Install the dependencies
RUN pip install --no-cache-dir --upgrade -r /demo/requirements.txt
Then, whenever we make ANY change to our source files, then the cache for all the layers handling copying requirements and installing them CANNOT be re-used.
Finally, the step 6 defines the command that must be executed upon running a container.
6. Build the Docker Image!
Now let’s finally build our docker image and execute it!
1
docker build -t demo-image:latest .
-toption enables you define the tag of the image.latestis the tag in our case. If you omit the:{tag_name}, it will automatically set tolatest.- You don’t have to provide the specific path for the Dockerfile as docker will find the Dockerfile in the directory specified by
.itself. Hence, just provide.to tell Docker “Hey Docker, find the dockerfile in the current working working directory”.
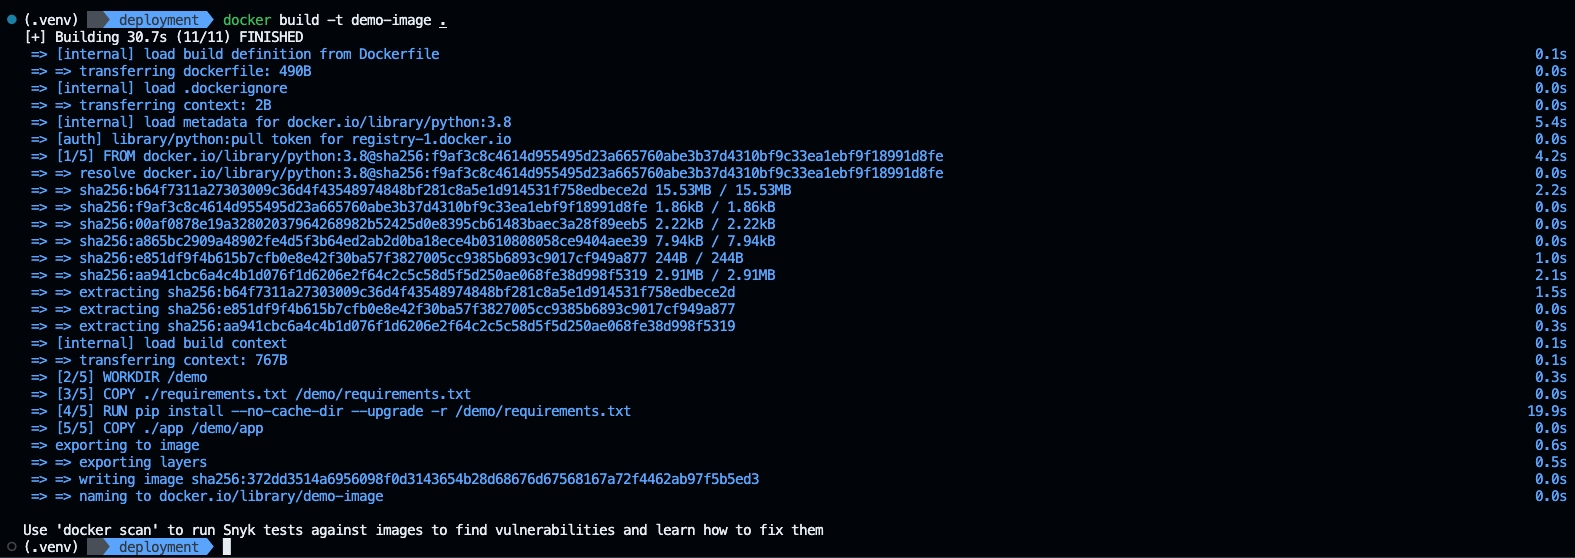
Notice that building an image “for the first time” took around 30.7s. It follows the exact instructions we provided earlier in the Dockerfile.
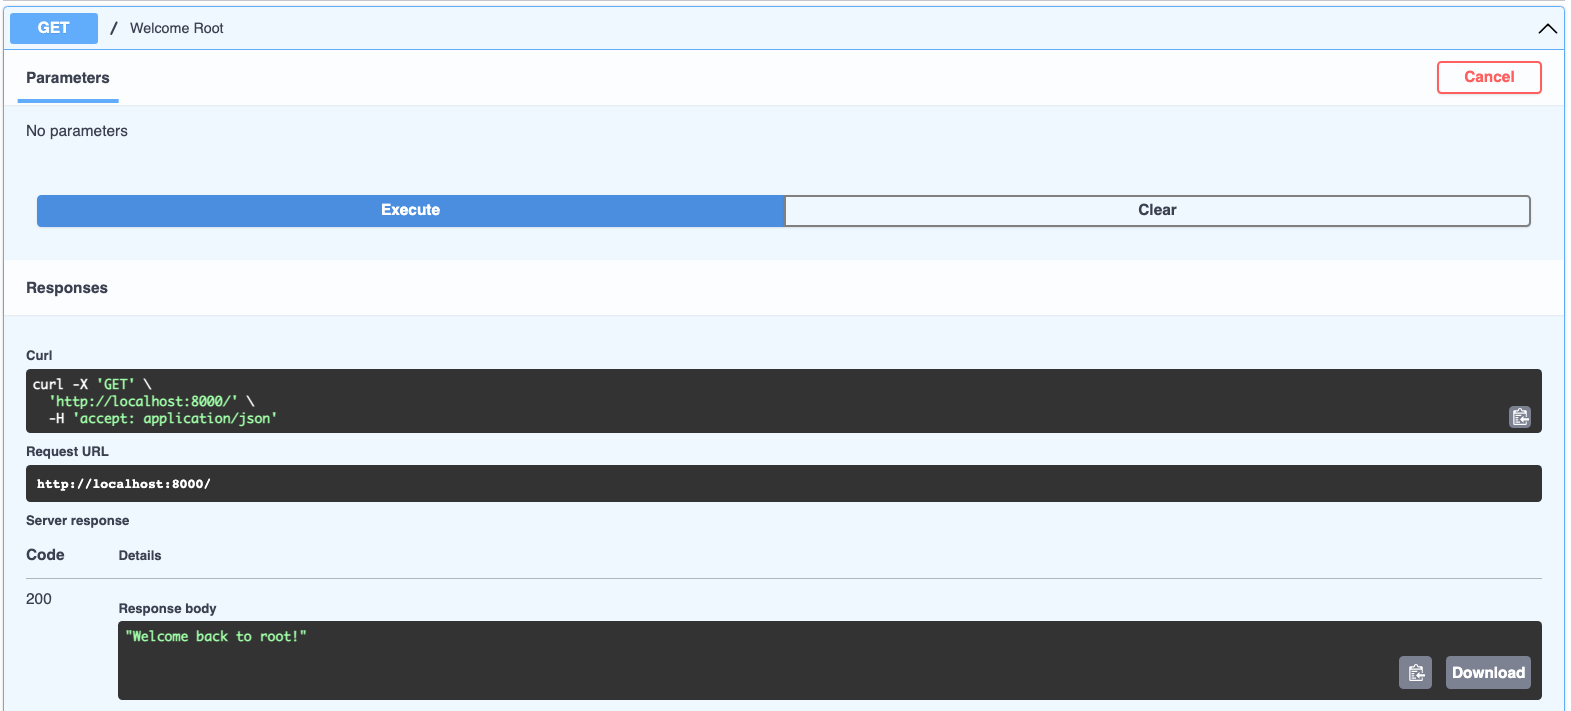
Now let’s build for the second time with a tag name demo-image- but a minor fix in our main.py
1
2
3
4
5
6
7
from fastapi import FastAPI

app = FastAPI()

@app.get('/')
def welcome_root():
    return "Welcome back to root!" # changed the msg
Now the building time is only 1.3s which is a huge improvement. If you see the log, Docker used the cache for copying and installing requirements and only add a new layer for copying our source files.
Now we have created our first docker image!
7. Execute a Docker container!
To run a container from the image we just created, run the following command.
1
docker run -p 8000:8000 demo-image
Great! We can now access our container.
[Info] -p A:B option tells Docker to publish a container’s port B to the host port A. As I mentioned earlier, containers are completely isolated from the outside environment so you need to expliclty set the container networking to expose the container ports.


