- Introduction
- Installation
- Our first CLI app
- CLI Argument and Option
- Command
- Build To-do list
- Bonus - separate commands into different folders
- Publish your app
1. Introduction
In this article, we’ll build a fully functional CLI (Command Line Interface) app with Typer.
Typer is an amazing library for buliding CLI applications backed by Python 3.6+ type hints. Hence, you need Python >3.6 version. Typer is actually maintained by @tiangolo of FastAPI.
Our goal is to build a simple To-do list app which supports adding and removing tasks.
2. Installation
Create a project root directory and create a virtual environment to have an isolated project environment.
1
2
virtualenv .venv
source .venv/bin/activate
Then install Typer by
1
pip install "typer[all]"
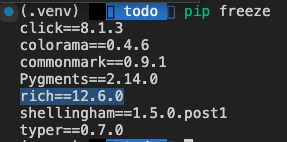
To see the installed packages run pip freeze
Notice that rich library, providing advanced style decorations in terminal, is also installed. We’ll use rich to stylize our app later.
3. Our first CLI app
Let’s first create the simplest CLI app with only one command.
Create a main.py and paste the code below.
1
2
3
4
5
6
7
import typer

def main():
    print("Hello World!")

if __name__ == "__main__":
    typer.run(main)
When you run python main.py, you’ll see the following result.
Run python main.py --help to see the help message.
But.. it doesn’t really look like a CLI app for now. We need arguments and options(flags) to make it do something.
Before that, let’s go over what “argument” and “option” refer to in the context of Typer.
4. CLI Argument and Option
An argument in Typer context refers to the “required” (you can make it optional or have a default value later) CLI parameters enforced to be provided in a specific order.
An option refers to “flags”, usually prepended by -- or - like -i and --force you’ve seen in other CLI apps. Options do not have to be provided in a specific order.
Let’s create an argument and option to make our app more functional.
1
2
3
4
5
6
7
8
9
10
11
12
import typer

def main(
    name: str = typer.Argument(..., help="Your name"),
    formal: bool = typer.Option(False, "-f", "--formal", help="Formal greeting")
):
    informal_greeting = f"What's up {name}!"
    formal_greeting = f"Hello, {name}."
    print(formal_greeting if formal else informal_greeting)

if __name__ == "__main__":
    typer.run(main)
Argument
In order to define an argument, pass typer.Argument() for the parameter. To make it required, pass ... as a default value (... is a special single value called “Elipsis” in Python). If you provide some default value like Jason instead of ..., then this argument will be optional.
Option
Options work similar to arguments. In order to define an option, pass typer.Option() for the parameter. Notice that we provided a default value False to make formal “optional”. To set the option names, define a list of positional arguments after the first argument. In this case, we use -f and --formal to indicate whether the greeting is formal or not.
Let’s try it out! Remember we have one “required” argument and one “optional” option.
If we provide the argument name without formal option, then it will greet us informally.
1
python main.py Jason
If we pass -f or --formal option, then we’ll see formal greeting.
1
python main.py Jason --formal
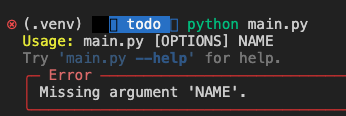
If we don’t pass any argument, then we’ll see this nice error message.
5. Command
In most cases, a CLI app has multiple commands. Git has tons of commands such as add, commit, push, and so on.
So far, we have not really built a command.
In order to register different commands we first define app = typer.Typer() and register our commands with a decorator.
1
2
3
4
5
6
7
8
9
10
11
12
13
14
15
16
import typer

app = typer.Typer()

@app.command("greeting")
def greeting():
    print("hello!")


@app.command("farewell")
def farewell():
    print("bye..")


if __name__ == "__main__":
    app()
Above, we created two commands called greeting and farewell.
To see all the registered commands, run python main.py --help
Let’s now run the commands.
Now we’re ready to build our first to-do list app!
6. Build To-do list
Let’s create a python file called todo.py which is where all our commands will go into.
In our app, we will have three commands
add: Add a taskdone: Remove a taskshow: Show all tasks
Create config.json in the project root directory as we’ll use it as the task storage. For simplicity, a task will only have task name property.
config.json
1
2
3
{
  "tasks": []
}
Before we build our commands, let’s create utils.py containing operations we need to manage our tasks.
utils.py
1
2
3
4
5
6
7
8
9
10
11
12
13
14
15
16
17
18
19
20
21
22
23
24
25
26
27
28
29
30
31
32
33
34
35
36
37
38
39
import json
from rich.table import Table
from rich.console import Console

console = Console()

def read_json(fpath):
    with open(fpath, 'r') as f:
        data = json.load(f)
        return data


def write_json(fpath, data):
    with open(fpath, 'w') as f:
        json.dump(data, f)


def add_task(fpath: str, new_task: str):
    data = read_json(fpath)
    data['tasks'].append(new_task)
    write_json(fpath, data)


def remove_task(fpath: str, task: str):
    data = read_json(fpath)
    if task not in data['tasks']:
        raise Exception(f"There's no task named {task}!")
    idx = data['tasks'].index(task)
    print(idx)
    data['tasks'].pop(idx)
    write_json(fpath, data)


def show_tasks(fpath: str):
    table = Table("ID", "Name")
    tasks = read_json(fpath)['tasks']
    for i in range(len(tasks)):
        table.add_row(str(i + 1), tasks[i])
    console.print(table)
To display texts nicely in a terminal, import rich.console instead of the default python print function.
To display tasks nicely in a table format, import rich.table.
1
2
3
4
5
6
7
8
9
10
11
12
13
14
15
16
17
18
19
20
21
22
23
24
25
26
27
28
29
30
31
32
33
34
import typer
import utils
from rich.console import Console
from rich.table import Table

app = typer.Typer(rich_markup_mode='rich')
console = Console()
cfg_path = "config.json"


@app.command("add")
def add(
    task: str = typer.Argument(..., help="Task to be added")
):
    utils.add_task(cfg_path, task)
    console.print("[yellow]Task added successfully![/yellow]")
    utils.show_tasks(cfg_path)


@app.command("done")
def done(
    task: str = typer.Argument(..., help="Task to be deleted")
):
    utils.remove_task(cfg_path, task)
    console.print("[yellow]Task removed successfully![/yellow]")
    utils.show_tasks(cfg_path)


@app.command("show")
def show():
    utils.show_tasks(cfg_path)

if __name__ == "__main__":
    app()
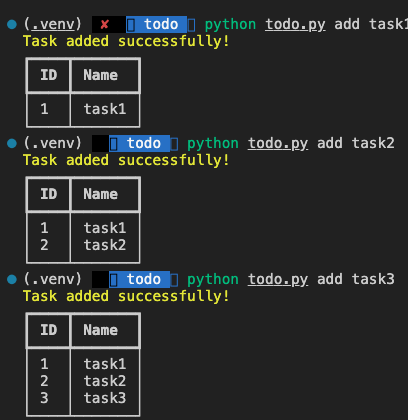
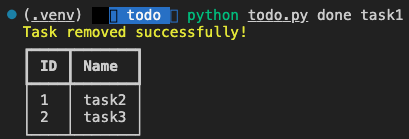
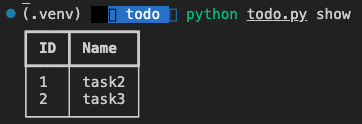
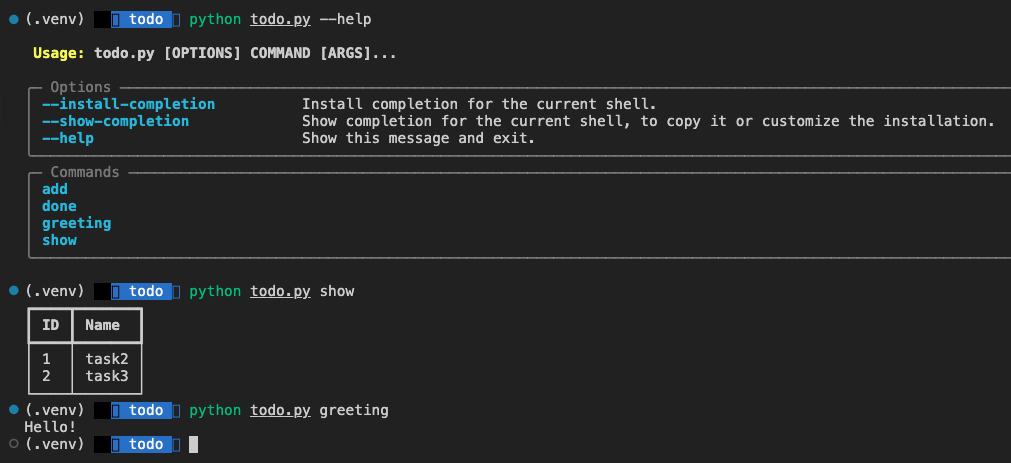
Now, let’s test our todo app.
- To add a task, run
python todo.py add <name>.
Great! Now you can go ahead an design your powerful CLI app :)
7. Bonus) separate commands into different folders
As you scale up your CLI project, you don’t want to cram all commands into a single file. Typer proides a guideline to separate commands into different folder but that’s for sub-commands like git remote add.
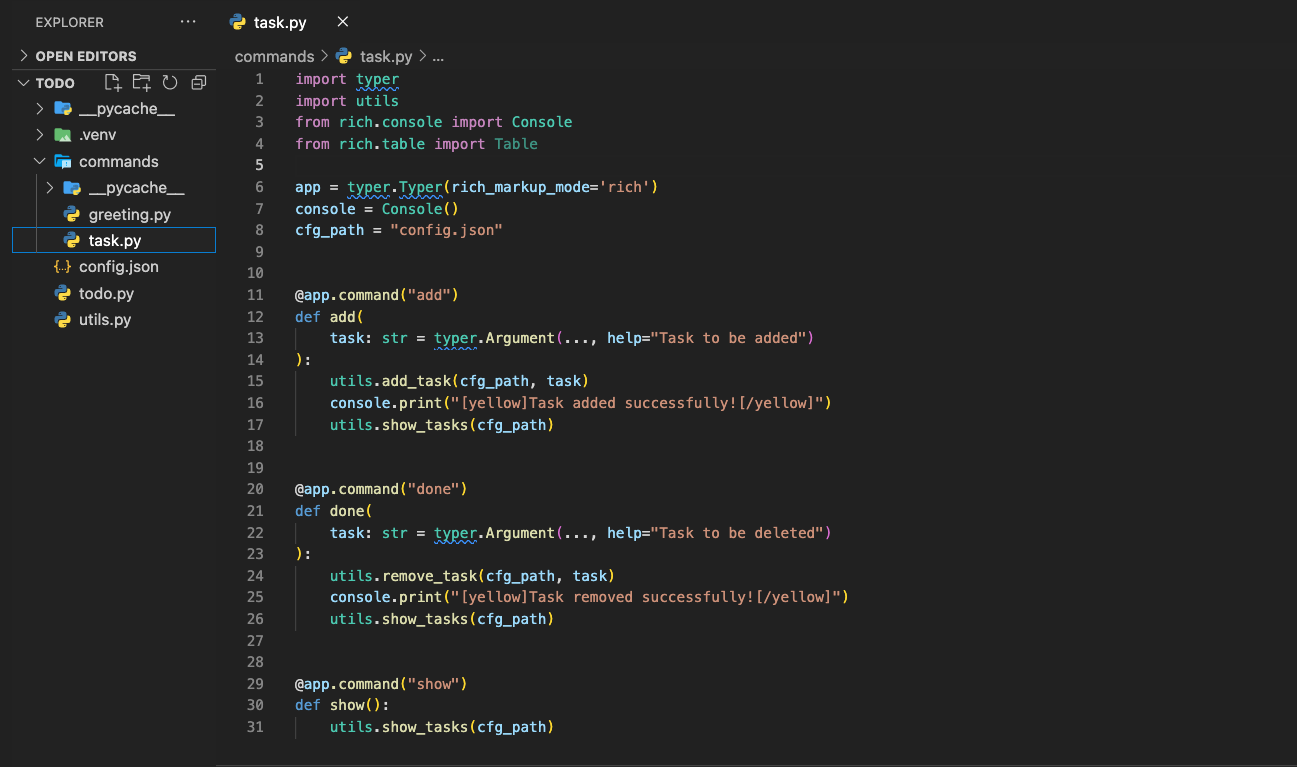
To separate single-layer commands, create commands/ directory. Then, put all the commands we created above in commands/task.py.
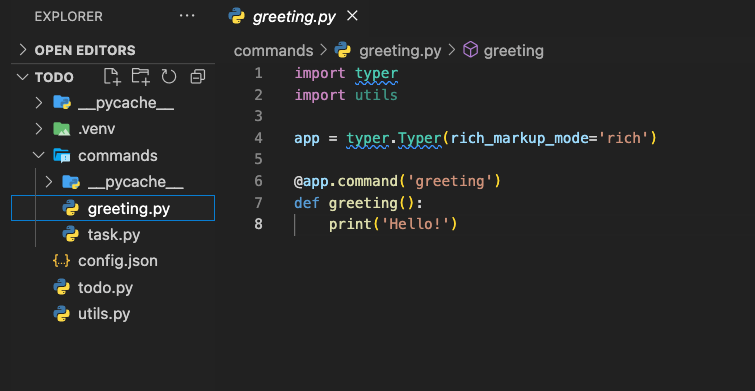
For demonstration, create another file commands/greeting.py
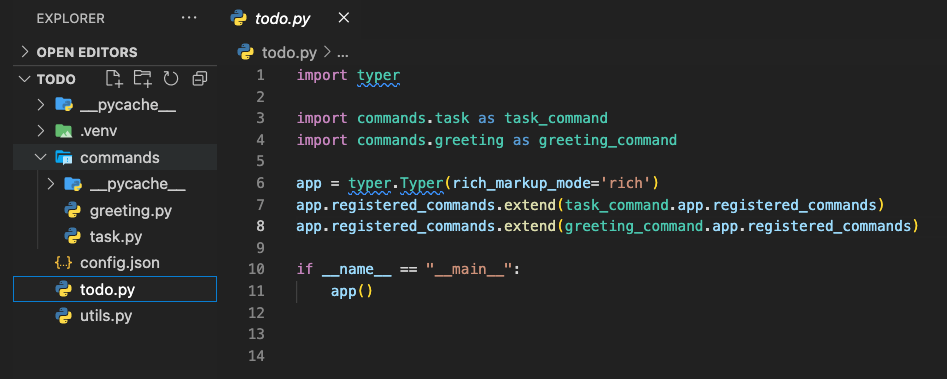
Fianlly, register the commands in todo.py
Let’s test it.
8. Publish your app
What’s the point if we don’t publish our app so that other people could download it?
Visit the article for a detailed guide to publish CLI apps.

